

Hey friends!
Today I am going to be showing you how to knit the butterfly stitch.
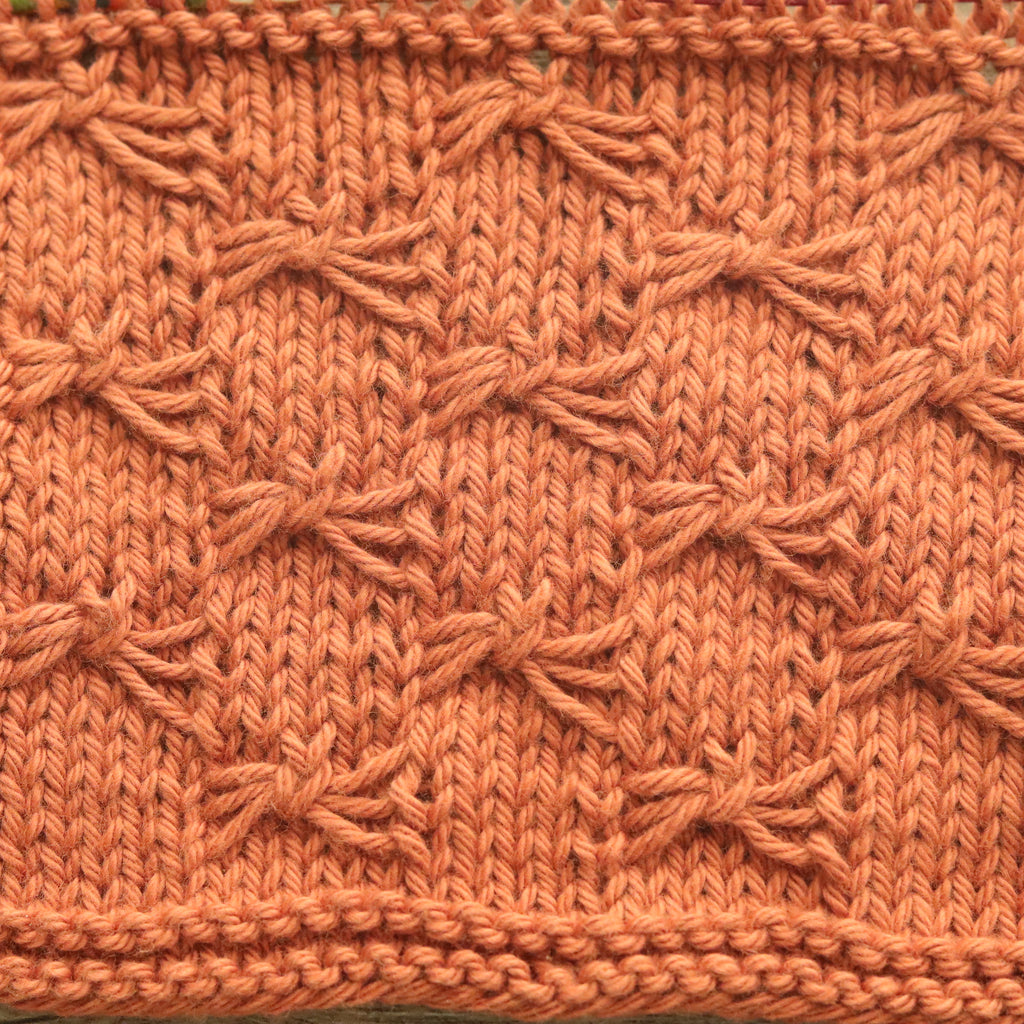
The butterfly stitch is very simple to knit yet it gives the illusion of great difficulty, making it an excellent stitch to keep in your back pocket.

Use this stitch to add interest to basic stockinette jumpers, sweaters, or other vanilla knitting patterns. Create a more abrasive and effective hand-knit dishcloth by using this stitch to add texture to your work.
You can even use it to knit a Halloween-themed jumper, with the butterflies doubling as tiny knit spiders, oh my 🕷!

Before we get started, here are a few key things to remember about this stitch. The butterfly stitch is constructed entirely of knit and purl stitches.
The "wings" of the butterfly or "legs" of the spider are achieved by holding your working yarn in front of your work and creating yarn floats while slipping five stitches behind them, from the left to right needle.
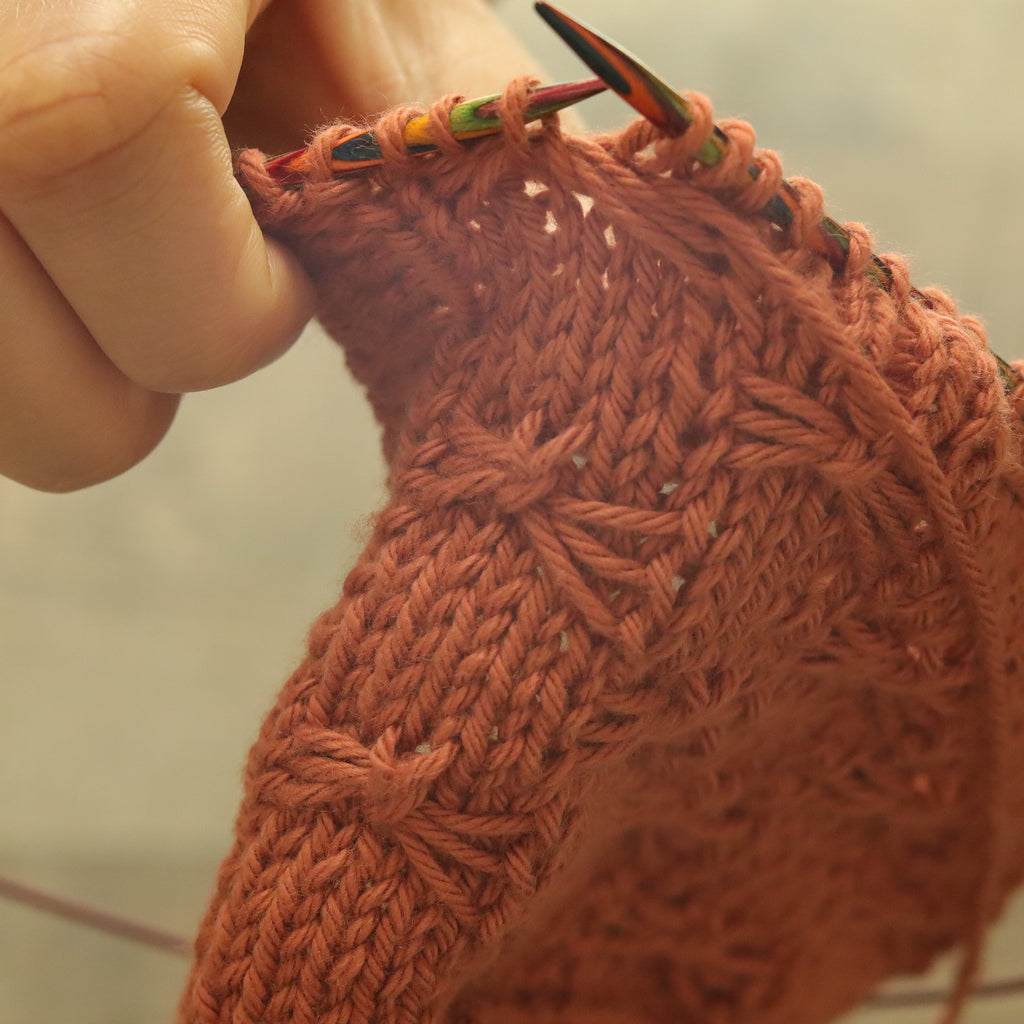
To achieve the "body" of the butterfly or spider, you will need to wrap your working yarn around the three strands of yarn floats in the front of your work, create a knit stitch using the yarn over method, then bind that new stitch off.
Make sure you knit the first three previously slipped stitches before creating the "body" to ensure that it is perfectly centered.
Sound good? Awesome, let's get knitting!
Little Butterfly Stitch | Tiny Bow Knit Stitch | Knit Spider Stitch Pattern
Key Knitting Abbreviations (Click here for more standardized knitting abbreviations):
(RS) = Right Side (For this demonstration all RS will be odd numbered rows)
(WS) = Wrong Side (For this demonstration all WS will be even numbered rows)
K = Knit
P = Purl
WYIF = With yarn in front
YO = Yarn over
BO = Bind off
STS = Stitches
Worked over a multiple of 10 STS + 7
Rows 1, 3, and 5 (RS): K1, *K5, SL5 WYIF, Repeat from * until 6 STS remain, K6.
Rows 2 and 4 (WS): P all
Row 6: P8 *Insert working needle from bottom up behind yarn floats on RS of work, YO and use working needle to create a stitch, P1 and pass new stitch over 1st stitch on right needle to BO, P9. Repeat from * until 8 STS remain, P8.
Rows 7, 9, and 11: K1, *SL5 WYIF, K5, Repeat from * until 6 STS remain, SL5 WYIF, K1.
Rows 8 & 10: P all STS
Row 12: P3, *Insert working needle from bottom up behind yarn floats on RS of work, YO and use working needle to create a stitch, P1 and pass new stitch over 1st stitch on right needle to BO, P9. Repeat from * until 3 STS remain, P3.Repeat rows 1-12 until desired length is achieved.
And just like that, you have mastered the butterfly stitch, go you!
I did not invent the butterfly stitch, but if you learned how to knit it by following the tutorial in this blog post, then make sure to follow Plant & Fiber on Instagram.Tag us using the hashtag #plantandfiber so that we can see your lovely (or spooky 👀) creations.
Lots of love and as always happy knitting,
